
Custom
Embroidered
Patches
The cornerstone of custom branding. Whether you're a sports team, corporate entity, or fashion brand, our embroidered patches offer a high-quality, professional solution that lasts for years.
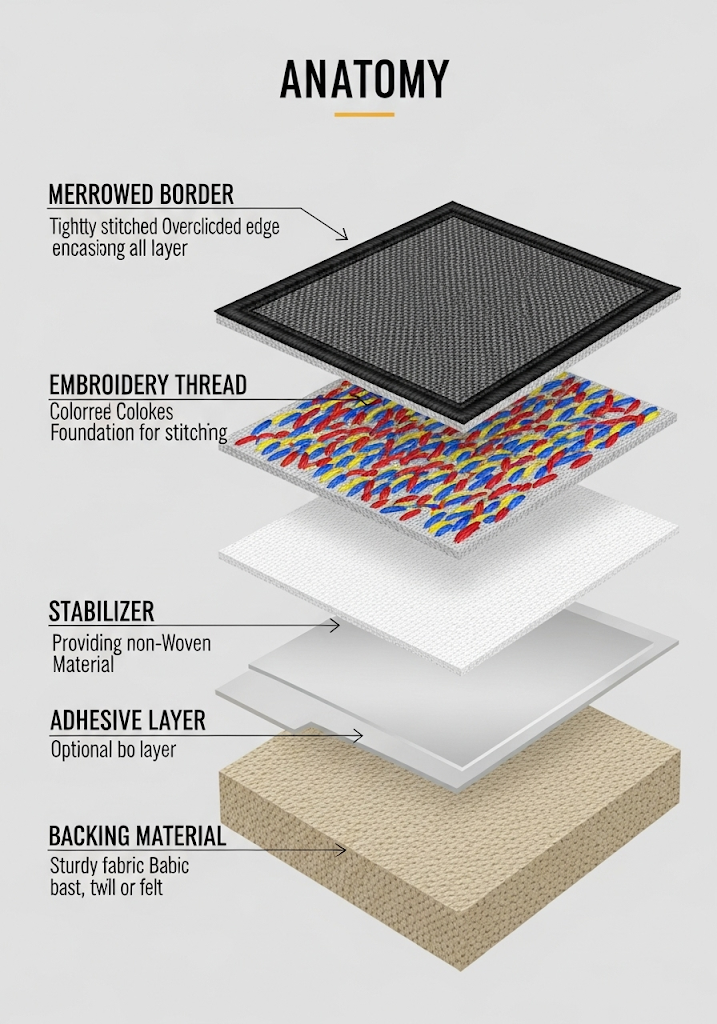
Premium Anatomy of a Patch
Heavy Twill Base
Tightly woven fabric that serves as the foundation for smooth, flat embroidery without puckering.
High-Lustre Threads
Industrial-grade polyester or rayon threads that resist fading and hold vibrant colors for life.
Merrowed Edges
Classic overlock border that provides a premium frame and prevents fraying at the edges.
Technical Specifications
Professional standards for professional results.
| Feature | Details |
|---|---|
| Stitch Count | Up to 15,000 per 3-inch patch |
| Thread Limit | Up to 12 colors per design at no extra cost |
| Backing Options | Iron-On (Heat Seal), Velcro, Adhesive, Sew-On |
| Border Type | Merrowed (Overlock) or Heat-Cut (Laser) |
| Washability | Machine washable, dry clean safe |
Quality Comparison
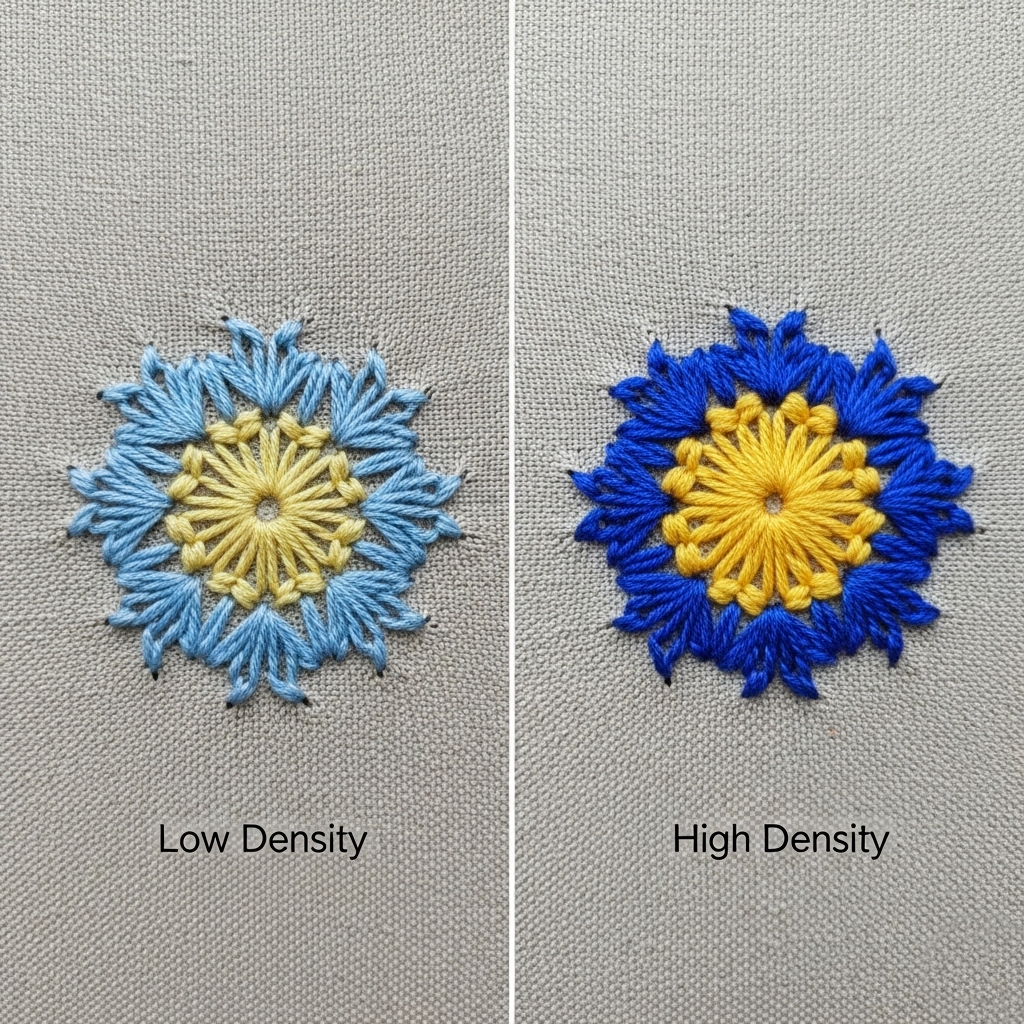
6,000 vs 12,000 stitches side-by-side
Industry Use Cases

Corporate Security

Educational Institutions

Fashion Apparel

Tactical Units

Corporate Events
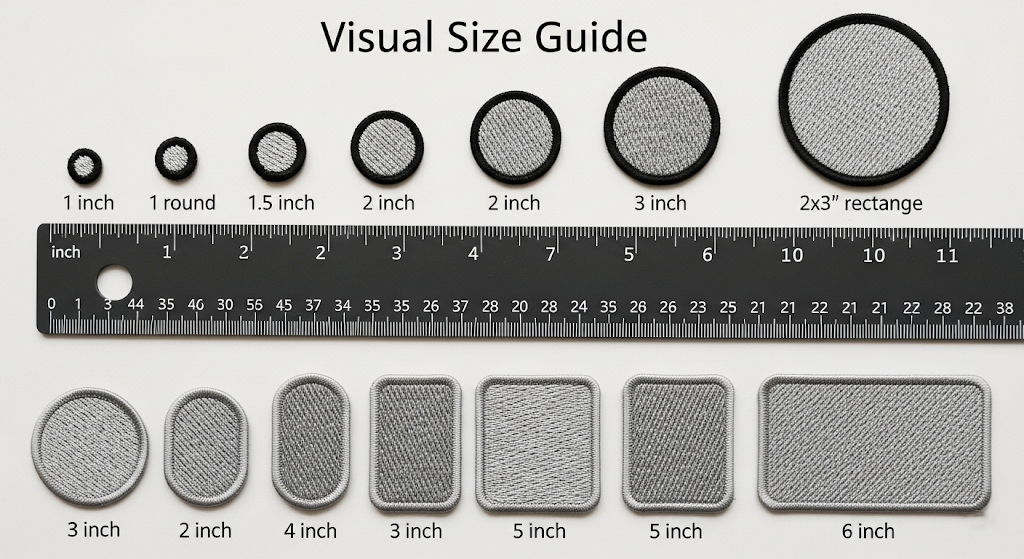
Choosing Your Size
How To Apply Your Iron-On Patches
A professional step-by-step guide to achieving permanent adhesion.
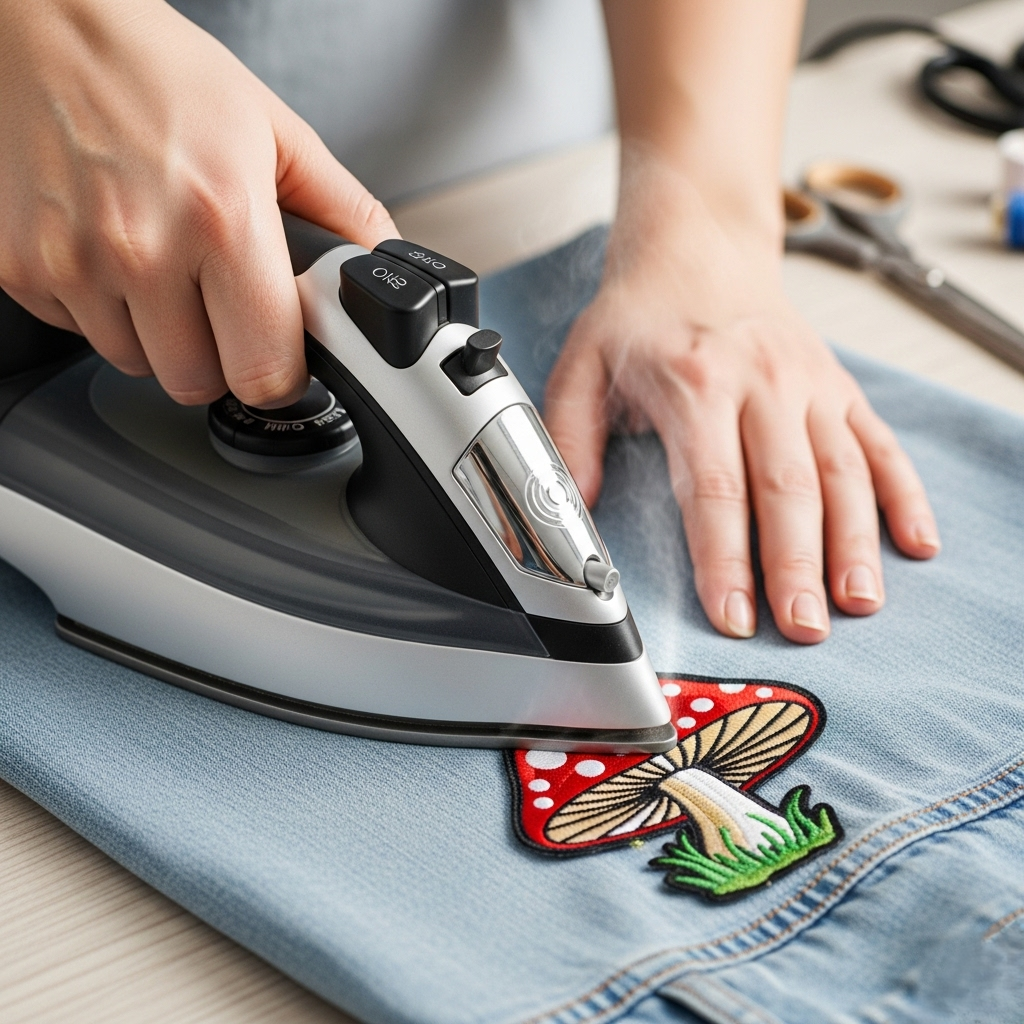
Step 1: Set Iron
Set your iron to 'Cotton' setting (approx 160°C). Do not use steam; ensure the reservoir is empty.
Step 2: Position
Lay your garment on a flat, heat-resistant surface. Position the patch exactly where you want it.
Step 3: Cover
Place a thin pressing cloth (like a clean pillowcase) over the patch to protect the embroidery threads.
Step 4: Press
Apply firm pressure with the iron for 20-30 seconds. Do not move the iron back and forth.
Step 5: Cool
Let the patch cool completely (approx 5 mins). Adhesion happens as the heat-seal glue solidifies.
Step 6: Test
Gently pull the edge. If it lifts, repeat pressing for 10 more seconds. For permanent use, we recommend a few tack stitches.

Request Your Custom Quote
Join 5,000+ satisfied clients today.